I'm excited to introduce you to my friend, Chiara from
She is the sweetest girl, so very talented, and just look at those two little munchkins in matching argyle! Love! You'll love her blog, as well, so go check it out!
* * * * * * * * * *
Hi, I'm Chiara (pronounced Key-r-uh--don't worry, no one says it correctly), and I'm beyond blessed to be guest posting on In Between Laundry today!
I am the queen bee in our home, as I have two cuh-raaaazy boys!
Come over and visit me some time at Calico and Cupcakes. I love all things creative except sewing (I don't know how and I don't think I have the patience), and I especially love to give encouragement to great projects and ideas I see out there in blogland. You all are amazingly talented!
Today I'd like to share my Vertical Photo Banner project. I love to make these for birthday parties or wedding or baby showers. They have a dramatic effect with very little work.
I have my soon to be 5 year old's birthday party quickly approaching at the end of March. We are having a carnival themed party, and I am making a some vertical photo banners of my son's first 5 years.
You are going to need the following supplies:
Photos of the guest of honor
Ribbon in coordinating party colors
Scrapbooking paper as a decorative photo border
Cardstock paper
Glue (any kind that works with paper and photos--I used Elmer's liquid and a gluestick).
I am making 4 vertical photo banners, with 3 photos on each banner. Since it is a carnival party, we are using red, white and blue as the main color palate.
First, I ordered twelve 8 by 10 photos of my son throughout the first 5 years (You can use whatever size photos you want). I went online and got mine from Costco. After I ordered them online, they even mailed the photos to my house--easy! I forgot to click lustre, so my example banners all have glossy pictures. Because of the glare (sorry about that), I recommend buying the photos with a lustre finish.
I went to Michael's and got 24 pieces of cardstock paper (I would only need 12 if I weren't free hanging my banners--you'll see what I mean), 12 pieces of scrapbooking paper and spools of ribbon. The length of ribbon that you will need depends on the height from which you are hanging your banners. Premeasure before you head out to the store.
Cut your scrapbooking paper to the size you want so it borders your photos.
Glue your scrapbooking paper to the cardstock paper.
Center and glue your photo onto the scrapbooking paper.
Let these papers and photos all dry together as you see below. Don't you just want to pinch those cheeks? Love 'em!
Once dry, take the ribbon and glue it down the middle of the back cardstock paper. You want to leave about a foot of ribbon hanging off the top. Then sandwich the ribbon in the middle by glueing the back of the already done photo page to the top of the ribbon. (Sorry for the sunny lines--I was enjoying the California sun on my patio)!
A ribbon sandwich!
Do this with each photo and leave about 3 to 5 inches of ribbon between each photo. I did three photos per vertical strand. As I said, I created 4 separate strands. Here is one of the strands completed.
Leave about 2 feet of ribbon hanging off the end. You want it to almost touch the ground if possible. (Before the party, I will trim the bottom of my ribbon so it isn't laying on the ground causing people to trip).
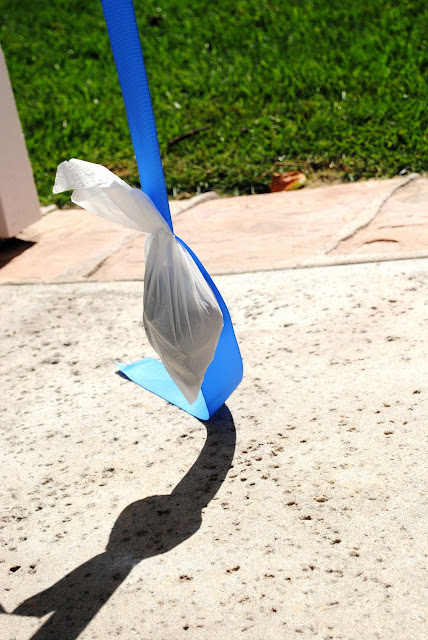
If you are hanging these outside, you want to weight the ribbon at the bottom because of the wind. I have used party goodie bags with rocks inside them and stapled them to the bottom of the ribbon. (I am a HUGE fan of staples).
You want the weight to hang but not touch the ground so the ribbon stays taut from the pull. This allows the ribbon to twist ever so slightly in the breeze, and it keeps the whole ribbon from floating up or spinning so much you can't see the pictures. (Again, I'll trim the very bottom of the ribbon when I hang these for the party).
Here are some pictures of the finished project. Notice my banners are free hanging (not against a wall), which is why I included a back piece of cardstock. You could add scrapbooking paper and pictures to the back too if you wanted!
Here is a picture of how I hung some of these at a recent baby shower I threw for a friend. They are hanging from my tall patio and are weighted to the ground with rocks inside the goodie bags.
You can also hang these against a wall or as a backdrop above a dessert table. If so, you do not need the extra sheet of cardstock paper in the back, as no one will see the ribbon or glue on the back of your photo cards.
These vertical photo banners can even be used for indoor decorating. If you use colors that compliment a child's room or your house, you can hang family pictures--even adding frames to "fancy it up".
Have fun with this project! It is simple and adds great drama to a space. Plus, at parties, guests always enjoy looking at the photo cards and reminiscing through all the pictures.
Thanks for letting me share this project with you!
Go have fun creating!


Cute! I love photo banners or walls at parties.
ReplyDeleteAdorable! Great idea for parties.
ReplyDeleteadorable! I can't wait to do this for my little guy's 2nd birthday!
ReplyDeleteI love this idea!!!! I would use it in my house for decoration too, not just for parties!
ReplyDeleteLove this idea! We too are doing a 'carnival' themed party in July...would love to see your other ideas!
ReplyDelete~alicia
proof-of-love.blogspot.com