Guess what I did on New Year's Eve?
(with company visiting, might I add)
We stayed up late (11:30) and got a little crazy with the backsplash.
Mmm. Hmmm.
And before you feel sorry for our house guests and think I am the worst hostess ever,
our friends totally volunteered to help out.
Okay, sure, they were probably just being nice and making a polite gesture,
but the hubs and I are long-past having any pride when it comes to this
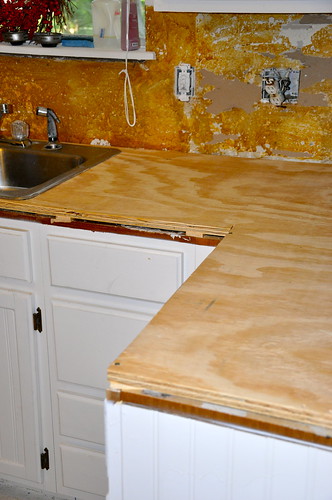
hot mess of a kitchen makeover.
Thanks, Caleb and Oly. You guys are awesome!! I am truly sorry I almost starved you on Saturday and made you work your fingers to the bone for the sake of my house looking pretty. I really hope you are still our friends anyway!!
Okay, you probably should feel sorry for them.
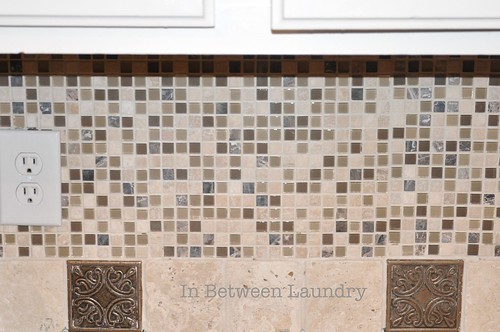
I, on the other hand, am completely pumped about how it turned out!
*****
Want to do it yourself?
Don't be afraid. It was not at all complicated.
With a little time, some elbow-grease, and a couple of suckers friends, you can do it too.
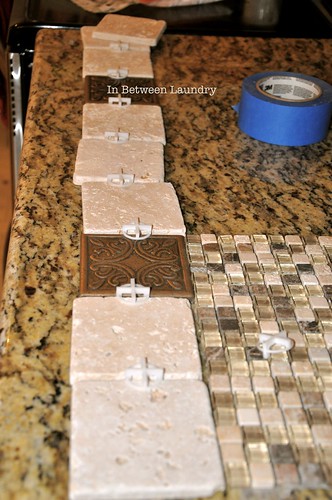
1. Measure your wall space and lay out your design before doing anything. We were able to design our kitchen backsplash without using a tile cutter, but you may need one.
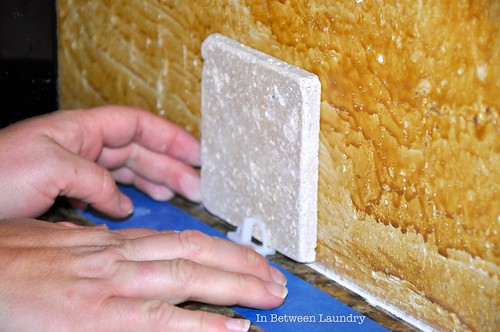
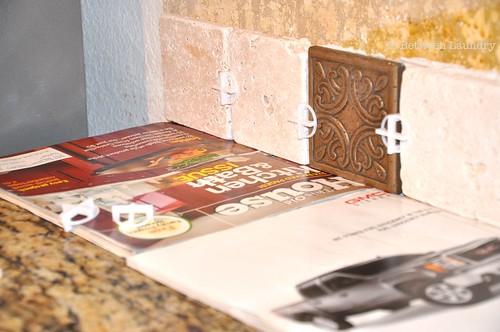
2. We used 1/8" tile spacers for the 4" tile trim under the mosaic.
(We also began by taping off the granite, but found that this step was unnecessary.)
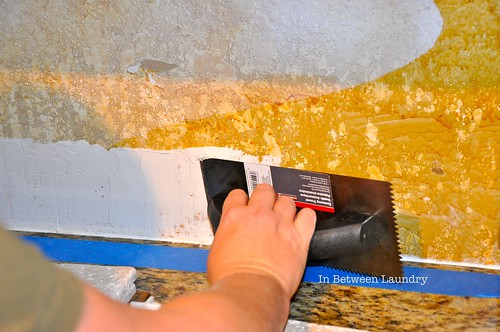
3. Using the smooth side of a trowel, spread a thin layer of thin-set-with-polymer mastic in a horizontal motion.
4. Apply a slightly thicker layer with the grooved edge.
You don't want to go too thick here because it won't dry evenly and the tiles may slide.
Let the grooved edge touch the wall when applying.
5. Secure the tiles on the mastic using a slight push-pull motion.
TIP: My friend, Oly, came up with this great idea-- use old magazines that are the same thickness to steady the tiles. This worked a lot better on the bottom than the tile spacers. Just make sure and remove them before they dry to the wall.
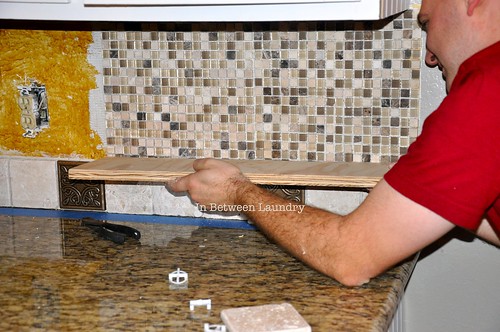
6. Remove the film behind the mesh on your mosaic tiles and place them on the wall using the same method you used before.
TIP: Using a piece of plywood helps to evenly add pressure to the tiles when securing.
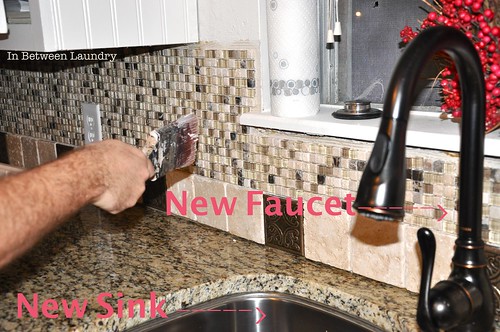
7. Let the tile set for 24 hours and then apply a stone sealer (we used DuPont) with a paint brush.
This is especially important since we used a stone tile. The grout would discolor the stone without the sealer and it offers an extra layer of protection from future water discoloration.
Let the sealer set for 72 hours.
This was when our nice friends said, "We're outta here."
And they left.
--something about jobs and their own stinkin' houses to tend to--
Whatever.
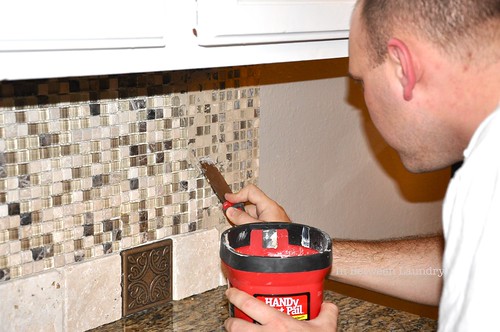
8. Now you can mix up your grout according to the manufacturer's instructions.
Use an unsanded grout.
It goes on smoothly and looks nice and polished on the wall.
9. We found that a 1" putty knife worked really well for filling all the grooves between small tiles.
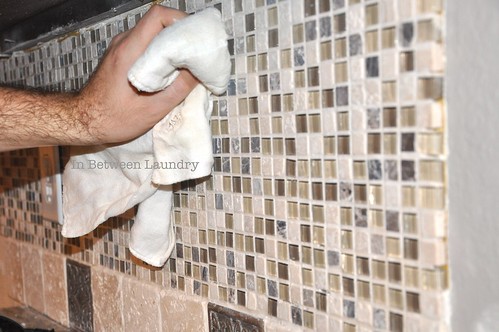
10. Immediately sponge off the excess with a damp sponge.
TIP: The Armaly ProPlus sponge worked great! It has a buffer side (the white part) that is rough and perfect for the first wipe-down. The smooth side worked well for wiping off the rest.
11. Polish with a dry cloth.
12. Let it set for 24 hours and seal it again.
Yay! You're done!
And so are we (at least with that part). Double-Yay!
We've come a long way, baby.
Now...

Sisters' Stuff, Seven Thirty Three, Finding Fabulous, Tatertots and Jello




That is gorgeous! I'm still not sure I would be brave enough to try it though :)
ReplyDeleteBeautiful work. I have to do my kitchen splash back too - want to come help me?????
ReplyDeleteSo pretty! I did a back splash, but only behind my stove. It actually matches the border in our tile since we did them at the same time. :)
ReplyDeleteThat looks so fantastic! You guys did a really great job. I love the new faucet.
ReplyDeleteI love it! Glass tile is one of my favorites, and I love the metallic accent. I bet you are enjoying it greatly!
ReplyDeleteAwesome! It looks beautiful. You should link this to my blog party DIY Thrifty Thursday @ www.thrifty101.blogspot.com. I found your side through Finding Fabulous. :)
ReplyDeleteI forgot to add that I've been thinking of doing this myself. So THANK YOU SO MUCH for the great instructions and photos.
ReplyDeleteHello! I found you through Finding Fabulous. I just wanted to let you know your backsplash looks awesome and you've inspired me to give it a try in my kitchen!
ReplyDelete