Tuesday, November 30, 2010

Snowflake Refrigerator Decor

Why not add a little Christmas magic to your fridge for the holidays?

That's where all the magic begins anyway. Ahem.

DSC_0005

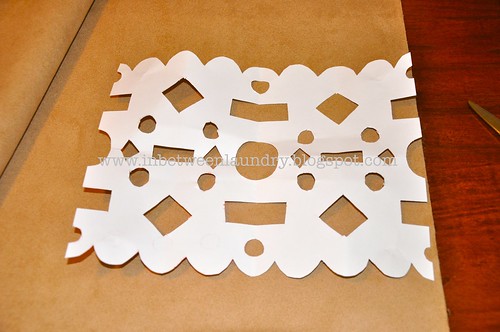
I came across these pre-cut felt snowflakes at JoAnn this past weekend and I couldn't pass them by.

They were 3 for $1--what a steal!

DSC_0005

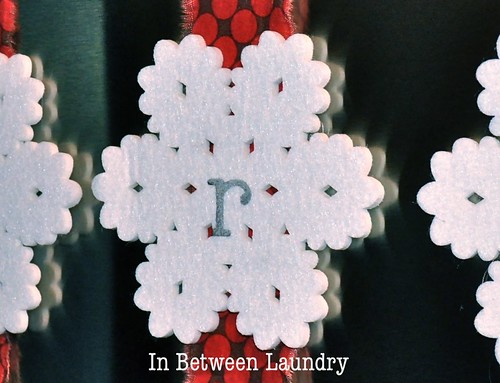
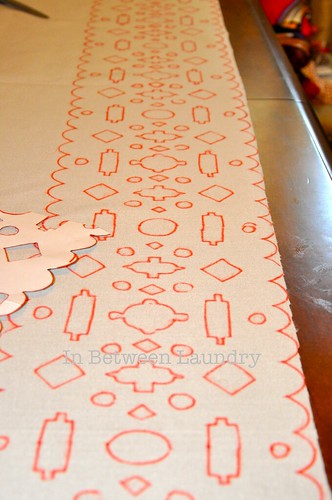
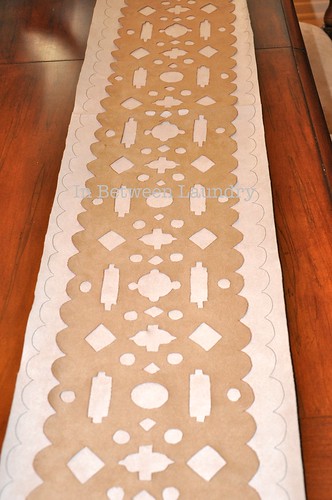
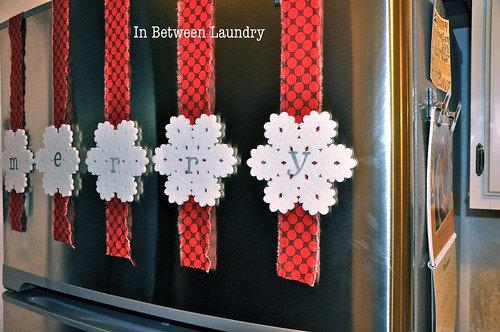
After gluing on some fabric strips--ripped, not cut-- and pulling out my favorite stamping set, they looked just right, but I was at a loss for where to put them.

DSC_0004

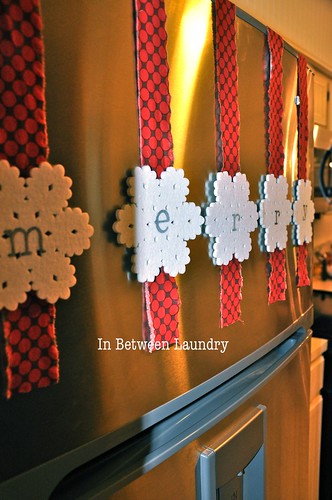
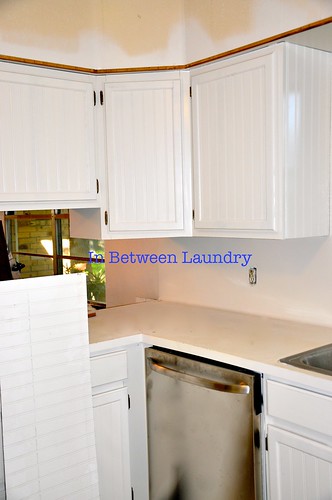
So I decided on the least expected place.

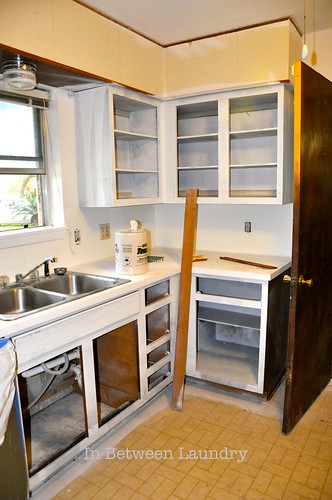
I love how it adds a little burst of color and personality to my white kitchen.

Merry, merry, merry Christmas!


Linked To:
seven thirty-three, Somewhat Simple, Frou Frou Decor

Monday, November 29, 2010

Scottie Dog Ornament

When I was a little girl, I had a red, black and white plaid purse that had little Scotties on it. I took it with me everywhere.

After all, I would never want to be stuck somewhere without my seven pennies or Happy Meal toy.

Ever since, I've loved Scottie dogs... and they just seem so Christmas-y to me.

Since I'm participating in an online gift exchange over at Craftaholics Anonymous (and the recipient of my gift said she collects Scotties...ooh I want to do that), this is what I came up with.

DSC_0012

I found a traceable pattern at Allsorts, here. Note that this is for felt--no seam allowances.

Instead of making a 3-D dog, I opted for a simple 2-D ornament.

I used miniature buttons for eyes, added a ribbon leash and finished him off with a felt Christmas rose.

Little guy, you are not going to be easy to part with.

That's it. 

I'm getting my purse back out.


Linked To:
Ana-White, Craftomaniac, The Girl Creative, Sugar Bee-Craft Edition, The Gypsy Corner, Today's Creative Blog, Blue Cricket Design, seven thirty-three, Somewhat Simple, Fingerprints on the Fridge, Frou Frou Decor, I Heart Naptime

Tuesday, November 23, 2010

Pumpkin Chocolate-Chip Pancakes

Scrumptious straight from the hot skillet...

DSC_0003

or with a drizzle of pure maple syrup...

DSC_0004

or (if you're feeling extra naughty), a little warm ganache.

DSC_0006

Enjoy them over the Thanksgiving weekend with your family. You'll be a hero.

DSC_0008

Pumpkin Chocolate-Chip Pancakes

1. Prepare your favorite pancake batter.

2. Stir in 1/2 cup of pureed pumpkin and 1/2 t. pumpkin pie spice.

3. Pour 1/3 cup of batter on a hot, buttered skillet and sprinkle chocolate chips on top.

4. Flip when the top side bubbles.

5. For the ganache, melt 1/2 cup chocolate chips with 3 T. milk or cream.


Linked to:
Blue Cricket Design, seventhirtythree

Change Table: Before and After

In the midst of redoing cabinets (we're adding crown molding right now and I can't wait to show you all the new pictures), unpacking boxes, etcetera, etcetera, I really wanted to finish up the baby's room.

Once we get all of the crown molding up and finish accessorizing, I'll post a REAL after picture.

But in the meantime, here is a little project I did over the weekend.

Before

DSC_0001


After


DSC_0014


We're all about the child labor around here.

Actually, he lost interest after 47 seconds. Rats!

So I finished the sanding myself, then added a couple of coats of paint.

See this for the the pom-pom baby mobile tutorial.

Have a wonderful Thanksgiving! 


I linked to:


Vintage Revivals


Thursday, November 18, 2010

Tutorial and Templates: Funny Thanksgiving T-Shirts

Butterball and Sweetie Pie
DSC_0007


1. Print out a template--I tweaked clip art and added the words.

Feel free to use my designs--they're at the bottom.

DSC_0002


2. Place the print-out on a piece of cardboard and slide both under your t-shirt.

3. Trace your design by dotting along the lines. I used a highlighter because it was light in color and it didn't skip on the fabric like a pencil or pen would.

DSC_0004


4. Use fabric paint over the traced design. Let it dry at least four hours.

DSC_0005


5. Take embarrassing pictures of your kids that you can pull out on first dates, graduation night, when meeting future in-laws, etc. (wink)

DSC_0020


My designs:


I was featured:

Today's Top Twenty

Linked To:

The DIY Show-off, Fingerprints on the Fridge, Finding Fabulous, The Gypsy Corner, All Thingz Related

Wednesday, November 17, 2010

Pom-Pom Baby Mobile

My sweet baby turned five months old today. I love him so much.

He'll be a stinky big boy before I know it.

But, at least for now, he's mommy's little squishy-squishy- roly-poly.

It's all going by so quickly, and I have a million "baby things" I want to make while he's still little enough to use them.

Today I'm marking #1 off the list. Yay!

DSC_0003


The poor child really did need something to look at besides the ceiling fan.

DSC_0004


Yarny Pom Poms: they're not just for the 70s.

DSC_0005


Have you ever tried them? You must! I found the tutorial here, at Hello Knitty.

DSC_0007


My brain is already spinning with possibilities for future crafts...

DSC_0011a


I love his little mobile.

DSC_0002


He loves it, too.

DSC_0011


Perfect.

DSC_0013


PS: I used a parakeet ladder for the top and fishing line for hanging it. I'll definitely put it up higher for safety, but kept it low for the pics.

I linked up at: The Gypsy Corner

Tuesday, November 16, 2010

Kitchen Cabinets Makeover--Part 2


DSC_0005a

After buying our fixer-upper and discovering that new cabinets were not in the budget, we decided to make do with what we have and spruce the old girls up a bit.

DSC_0001a

Bead board covereth a multitude of sins, my child.

DSC_0012

Using paintable/stainable wood filler, my hubby filled the gaps.

DSC_0004

He was very proud of himself.

DSC_0013a

And he should be, it was a lot of work.

DSC_0013

He laid out the doors and drawers and primed, then painted.

DSC_0009

It took about three coats and he sanded them in between each.

DSC_0012

In the meantime, he primed and painted the cabinets inside.

DSC_0001

Then he added the bead board to the sides and the backs using Gorilla Glue and clamps first,

DSC_0005

and then tacking them in place last.

DSC_0003

After the paint was very dry on the doors and drawers, he used steel wool to remove any imperfections in the paint--this gave it a really sleek look.

Then he added a final, light coat of paint.

DSC_0008

The updated doors made all the difference--the kitchen is looking so much brighter and newer.

DSC_0009a

We still have a lot of work ahead of us, though.

DSC_0010

But we're getting there.

And I'm loving how much better they look.

Friday, November 12, 2010

Slow Cooker Chocolate Pudding Cake

SlowCookerChocolatePuddingCake

This won't last long!

Ingredients:

18.25-oz. pkg. chocolate cake mix
3.9-oz. pkg. instant chocolate pudding mix
2 c. sour cream
4 eggs
1 c. water
3/4 c. oil
1/4 t. salt
2 c. semi-sweet chocolate chips

Combine everything except the chocolate chips with a mixer for two minutes. Pour into a slow cooker sprayed with non-stick vegetable spray. Cover and cook on low for 2-1/2 hours or until a toothpick comes out with moist crumbs (that's how long mine took--yours may vary). Stir if the edges start to look brown during the cooking time. Gently fold in chocolate chips while cake is still very hot. 

Serve topped with ice cream or fresh whipped cream.

Makes 10-12 servings.


Thursday, November 11, 2010

Tutorial: Reverse Applique Table Runner

DSC_0034

I had a little of this faux suede fabric leftover from the Davy Crockett treat bucket and had been itching to put it to good use.

In the spirit of fall and Thanksgiving, I decided to use my leftover scrap for a reverse applique/cut-out table runner.

I love how it turned out!

DSC_0020

1. Using a piece of card stock folded twice, cut out a design (paper-snowflake-style).

DSC_0022a

2. Determine how long you want your runner to be and trace the unfolded paper design on the fabric.

DSC_0023

DSC_0026

3. Put the kids in bed, turn on a movie, grab your scissors and cut that sucker out.

Take your time and work on it little by little.

4. With fabric glue, attach your cut-out to another piece of faux suede in a contrasting color.

DSC_0003

5. Draw scalloped edges along the bottom piece and cut that out. I recommend applying a third layer to the bottom and cutting it exactly like the second layer to add weight because the scalloped edges tend to roll up.

DSC_0022

I thought it turned out really pretty and added a nice neutral background to my nature-inspired table.

DSC_0033