Monday, January 31, 2011

Tutorial: Soft Photo Cube for Baby

Cupid came early and brought my Squishy-Squish-Squish this fun photo cube for Valentine's Day.

DSC_0044


I used photos of our immediate family-- Baby, Brother, Mommy and Daddy.

DSC_0018


Materials:
6 squares of fabric (6" x 6" each)
4 printed photos (4" x 4" each)
4 pieces of clear vinyl (4-1/4" x 4-1/4" each)*
ribbon for outlining the pictures
poly-fill
thread for sewing machine
needle and thread for hand stitching

*TIP: I recycled the clear vinyl packaging from a set of baby sheets and it worked great!

DSC_0021


Center the photos on four of the pieces of fabric that you want to use for the sides. Place the clear squares on top of the photos and pin in place. 

DSC_0022


Stitch in place, closely to the edges. You may want to use a heavy-duty machine needle.
Stitch ribbon on the edges, outlining each picture. This looks cute, but it also keeps those sharp edges on the vinyl from poking baby.

DSC_0025


Lay your squares out in a T-shape with your photos side by side and the top and bottom pieces above and below the left picture.

DSC_0027


Stitch everything in place, right sides together with a 1/4" seam allowance. 
Press the seams open, being very careful not to melt the vinyl.

DSC_0028


Bring the to and bottom pieces (the sock monkey fabric in my photos) to the next photo square and stitch, right sides together. The photo cube will be inside out at first.

DSC_0029


DSC_0030


Repeat until all sides--except one--are stitched together in a cube shape.

DSC_0031


Turn right-side out and stuff with the poly-fill. Hand-stitch shut.

DSC_0032


DSC_0033


DSC_0034


I think I'll make a few more for learning names of cousins, aunts and uncles who live out of town.

For now, my little guy thinks it tastes pretty good.

signature

giveaways

Wednesday, January 26, 2011

Make No-Slip Socks

I'd been wanting to do this project for a while now, so here goes...

Give
your plainy-Janey socks...

DSC_0012

one-of-a-kind no-slip soles.

DSC_0006

1. Place cardboard strips in your socks and paint designs on the bottom using Puffy Paint.

2. Let them dry according to package instructions (I left mine overnight).

DSC_0002

How cute are these all rolled up like rosettes for a gift?

Ooh-- throw in a great foot scrub (I have a great eBook full of sugar scrub recipes) and your Valentine will kiss your feet! Truth.

Some other ideas I came up with (but haven't yet tried) are:

stenciling the recipient's name,
writing the alphabet and
drawing butterflies or animal paw-prints.

DSC_0012
(love these).

signature

Sunday, January 23, 2011

Friday, January 21, 2011

Trash to Treasure for Valentine's Day

We're using what we've got over here.

I mentioned that our house came complete with weird chainy light fixtures in every bathroom and ... gasp... even in the master bedroom.


Oh, you don't remember? Well, I did. 

You can read about it here if you don't believe me. 

They were very (cough) unique and (cough) fancy and (cough) grotesque.

Here are my little lovelies in all of their former glory.

DSC_0024

DSC_0026

And here's how I made them cool.


DSC_0003

You can find out more about my gray and pink heart bunting here.

Lots of hearts to you, friends!
signature

Linked To: Stories of A to Z, CraftOManiac, The Girl Creative


Thursday, January 20, 2011

Just a Little Home Reno Update

What?! Is that me in the garage, using those power tools?

DSC_0008

Yup. Yours truly can now scratch 
cutting tile off the Bucket List
(after I add it first).

DSC_0019

After all that hard work, cutting those four, nay, five tiles, 
and laying a whole row of tiles all by myself, 
I was just too exhausted to tackle the grouting.

DSC_0015
Okay, so I didn't do it all by myself...

I had a little help...

My husband, Jeremy, and his friend, Steve, may or may not have completed 99% of the work 
and I may or may not have stuck the kids in the car and went to my girlfriend's house to hang out and play Wii Bowling.

Whatev.

DSC_0020a

Loving my new chandy and pretty floors (thanks, boys),

signature

Linking to: Seven Thirty-Three

Monday, January 17, 2011

A Simple Ribbon-Wreath

#1. Our date night was SO FUN!

I needed that night out (and thank you for the sweet comments and emails)!

Have you seen True Grit yet? (Probably so. I'm usually the last person to see a movie lately.)

We loved it!

#2. This is the cutest and easiest little heart wreath.


I bent a wire hanger into a heart shape and tied ribbons and bits of fabric all around, squishing them really tightly together to make it fluffy.

I had everything at home, too, which made it

FREE (my favorite word)!


DSC_0004.jpg


signature

The Girl Creative

Friday, January 14, 2011

Date Night!

Remember the 12 Dates of Christmas I made for my sweetie?

Well, we're making good on that promise and going out tonight...

with no kids...

to see a movie...

in the peace and quiet...

and are definitely having dessert...

that we don't have to share with little moochie poochers...

Then, we're going to go to a movie that isn't animated...

and we might even stop for coffee afterward...

where we most definitely will not buy a single apple juice box.

In fact, our very adult conversation will probably go something like this...

Me: I bet the boys are having fun with Pop and Bee Bee.

Hubs: I'm sure they are.

Me: I love them so much. I kind of wish they were here right now. Just kidding. Not really. Want to call?

Hubs: Um. No.

At which point, I'll remember this picture that I took today.

DSC_0007-2.jpg

And I'll have to tell my sweet, patient husband all about it.

signature

Thursday, January 13, 2011

Simple Applesauce

If you're a facebook fan, you know that I was recently on the hunt for a great apple recipe.

I was really thinking about doing some sort of pie, but let's face it...

The zipper on my jeans can't handle any more pie.

Thank you very much, holidays.

DSC_0008

So I decided on this pure, wholesome applesauce.

It's simple and versatile, a perfect afternoon snack.

Tonight it will accompany grilled pork chops and
(maybe if I'm feeling a bit naughty) a scoop of vanilla ice cream for dessert.

We won't tell my jeans.

DSC_0007

Try this. You will absolutely die.

Ingredients:
8 cups tart apples, peeled and chopped into 1/2" chunks
1/2 cup brown sugar
2 teaspoons vanilla
1 heaping teaspoon cinnamon

1. In a Dutch oven, combine all ingredients. Cover and cook on medium-low for 30-40 minutes, stirring occasionally.

2. When apples are tender, mash with a potato masher until desired consistency.

Yields about 3-1/2 cups.

Tip: When we've finished about half of it, I mix in store-bought jarred applesauce and no one's the wiser (wink).

signature

Tatertots and Jell-O, Finding Fabulous

Wednesday, January 12, 2011

Tutorial: Warm Winter Scarf for The Little

kid fleece scarf


Materials for a Preschool-Size Scarf:
7" x 35" piece of fleece (bottom layer)
5-1/2" x 35" piece of fleece (top layer)
35" piece of 1-1/2" ribbon
35" piece of 3/4" ribbon
5 buttons
thread for machine sewing
needle and thread for hand-sewing the buttons in place

fleece scarf for kids


1. Place the fleece pieces together, then lay the 1-1/2" ribbon on top, down the middle. 
2. Pin in place.

TIP: Use a lighter to seal the edges of your ribbons first so they will never fray.

fleece scarf


3. Stitch very closely along both edges using your sewing machine.
4. Pin the smaller ribbon on top and stitch along both sides, very close to the edges.


winter scarf for kids


5. Hand stitch your buttons along the top of the ribbons.
6. Cut slits in the top layer of fleece that are about 1-1/4" in width.

homemade fleece scarf for kids

signature

Somewhat Simple, Seven Thirty-Three, Sisters' Stuff, Finding Fabulous, Tatertots and Jell-O

Monday, January 10, 2011

Tutorial: How to Install a Mosaic Tile Backsplash

Guess what I did on New Year's Eve
(with company visiting, might I add)

DSC_0002

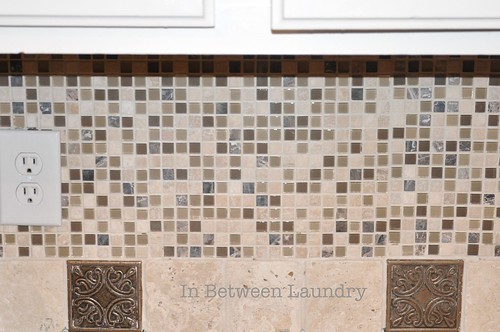
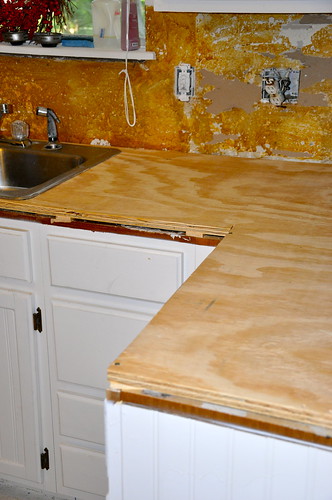
We stayed up late (11:30) and got a little crazy with the backsplash.

Mmm. Hmmm. 

And before you feel sorry for our house guests and think I am the worst hostess ever, 
our friends totally volunteered to help out. 

Okay, sure, they were probably just being nice and making a polite gesture, 
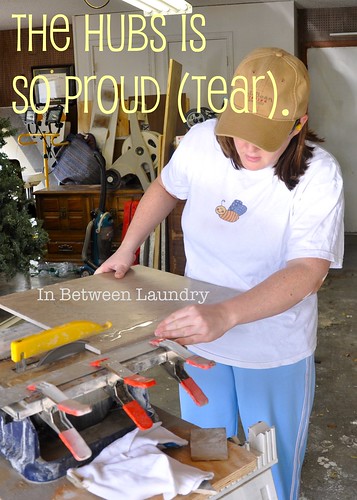
but the hubs and I are long-past having any pride when it comes to this 
hot mess of a kitchen makeover.

(See cabinet makeover here and here and here.)

Thanks, Caleb and Oly. You guys are awesome!! I am truly sorry I almost starved you on Saturday and made you work your fingers to the bone for the sake of my house looking pretty.  I really hope you are still our friends anyway!!

Okay, you probably should feel sorry for them. 
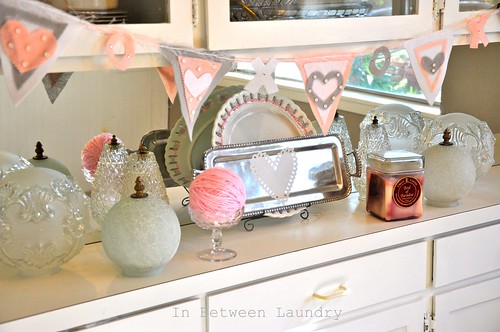
I, on the other hand, am completely pumped about how it turned out!

*****

Want to do it yourself?

Don't be afraid. It was not at all complicated. 
With a little time, some elbow-grease, and a couple of suckers friends, you can do it too.

DSC_0086

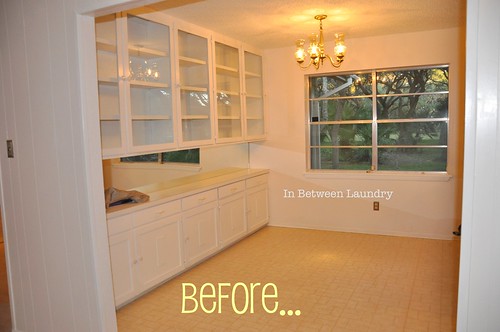
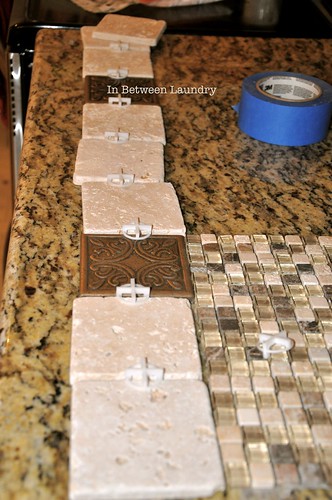
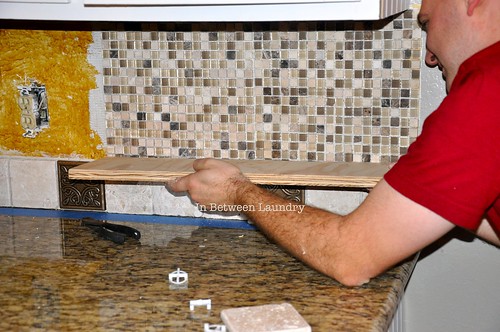
1. Measure your wall space and lay out your design before doing anything. We were able to design our kitchen backsplash without using a tile cutter, but you may need one.

DSC_0087

2. We used 1/8" tile spacers for the 4" tile trim under the mosaic. 
(We also began by taping off the granite, but found that this step was unnecessary.)

DSC_0088

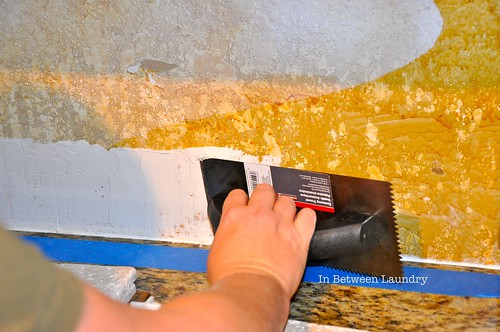
3. Using the smooth side of a trowel, spread a thin layer of thin-set-with-polymer mastic in a horizontal motion.

4. Apply a slightly thicker layer with the grooved edge. 
You don't want to go too thick here because it won't dry evenly and the tiles may slide. 
Let the grooved edge touch the wall when applying.

DSC_0091

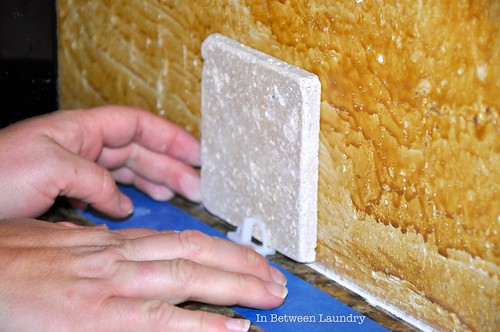
5. Secure the tiles on the mastic using a slight push-pull motion.

DSC_0092

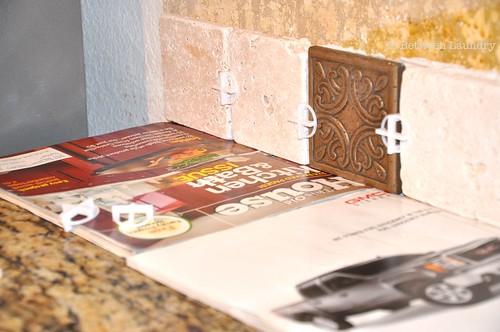
TIP: My friend, Oly, came up with this great idea-- use old magazines that are the same thickness to steady the tiles. This worked a lot better on the bottom than the tile spacers. Just make sure and remove them before they dry to the wall.

DSC_0093

6. Remove the film behind the mesh on your mosaic tiles and place them on the wall using the same method you used before.

DSC_0096

TIP: Using a piece of plywood helps to evenly add pressure to the tiles when securing.

DSC_0001

7. Let the tile set for 24 hours and then apply a stone sealer (we used DuPont) with a paint brush. 
This is especially important since we used a stone tile. The grout would discolor the stone without the sealer and it offers an extra layer of protection from future water discoloration. 

Let the sealer set for 72 hours. 

This was when our nice friends said, "We're outta here." 
And they left. 
--something about jobs and their own stinkin' houses to tend to-- 
Whatever. 

DSC_0011

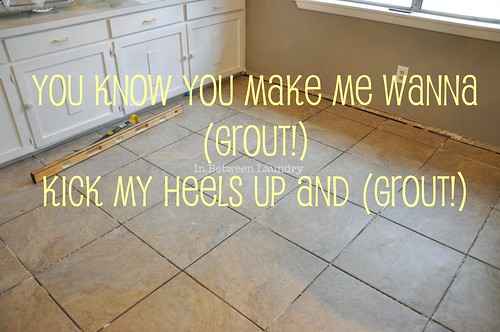
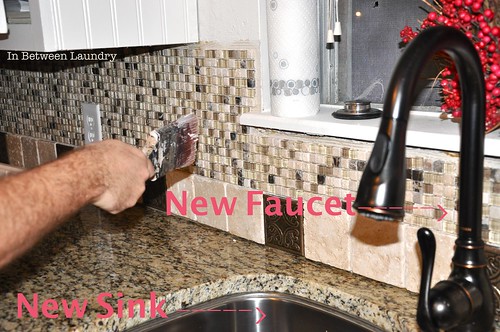
8. Now you can mix up your grout according to the manufacturer's instructions. 
Use an unsanded grout. 
It goes on smoothly and looks nice and polished on the wall.

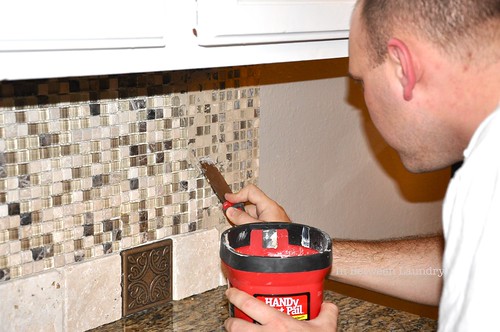
9. We found that a 1" putty knife worked really well for filling all the grooves between small tiles.

DSC_0016

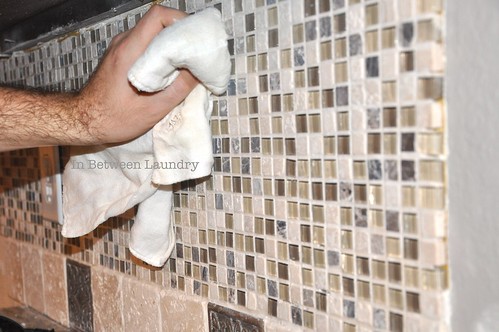
10. Immediately sponge off the excess with a damp sponge.

TIP: The Armaly ProPlus sponge worked great! It has a buffer side (the white part) that is rough and perfect for the first wipe-down. The smooth side worked well for wiping off the rest.

DSC_0018

11. Polish with a dry cloth.

12. Let it set for 24 hours and seal it again.

Yay! You're done!
And so are we (at least with that part). Double-Yay!

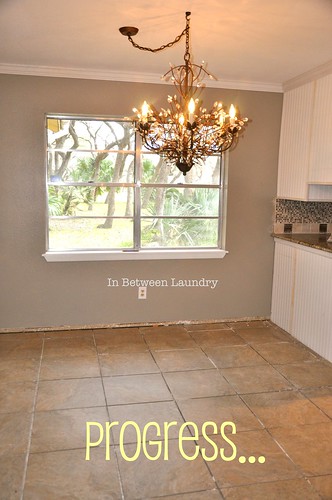
We've come a long way, baby.

DSC_0003

Now...

DSC_0002

signature

Sisters' Stuff, Seven Thirty Three, Finding Fabulous, Tatertots and Jello