Showing posts with label home reno. Show all posts

Friday, November 11, 2011

Firecracker Bathroom Cabinet (Before and After)

Did you catch my bathroom makeover? It's kinda epic and it's right here.

I wanted to talk a little bit more about this Craigslist cabinet. 

It is solid wood and has lots of shelves (which I did not paint, by the way). The insides are just as we found them. What had to go was the shiny, shiny, could-see-yourself-in-the-reflection finish.

And the gold hardware and the broken railing on top.

Other than those things, what a find, huh!?

Craigslist + me = BFFEAA

DSC_0450.jpg

This took several hours of late-night sanding (a lot of it by hand because I didn't want to buy a special tool for the grooves).

We removed the hardware and doors, then hit the hinges and pulls with my new favorite thing: spray paint for metal. I threw away the can, but it was Rustoleum in a hammered finish (bronze?).

DSC_0015.jpg

I'm a believer. The metal really looks hammered.

DSC_0012.jpg

Then, I painted it (with a brush)-- it took two coats-- with Firecracker by Valspar.

Committing to this hue really did take 45 minutes of standing in the paint aisle with two samples and deliberating over the pros and cons of subtle verses bold. I even handed the guy mixing the paint the other color then came back before he'd mixed it and switched at the last minute.

But you know what? It's only paint. If I had hated it, I could have painted it again. Not that I would have, but I COULD have.

Lucky for me, I really love it. It adds the warmth that the room needed.

And now I have plenty of storage for all of our towels and a laundry hamper on the bottom.

For the record, a month or so later, I'm still loving it.

erin

Shared with: Tatertots and Jello

Thursday, October 20, 2011

Guest Bathroom Makeover

I made a Facebook pinky-swear to post about the bathroom re-do today and I never break a pinky swear.

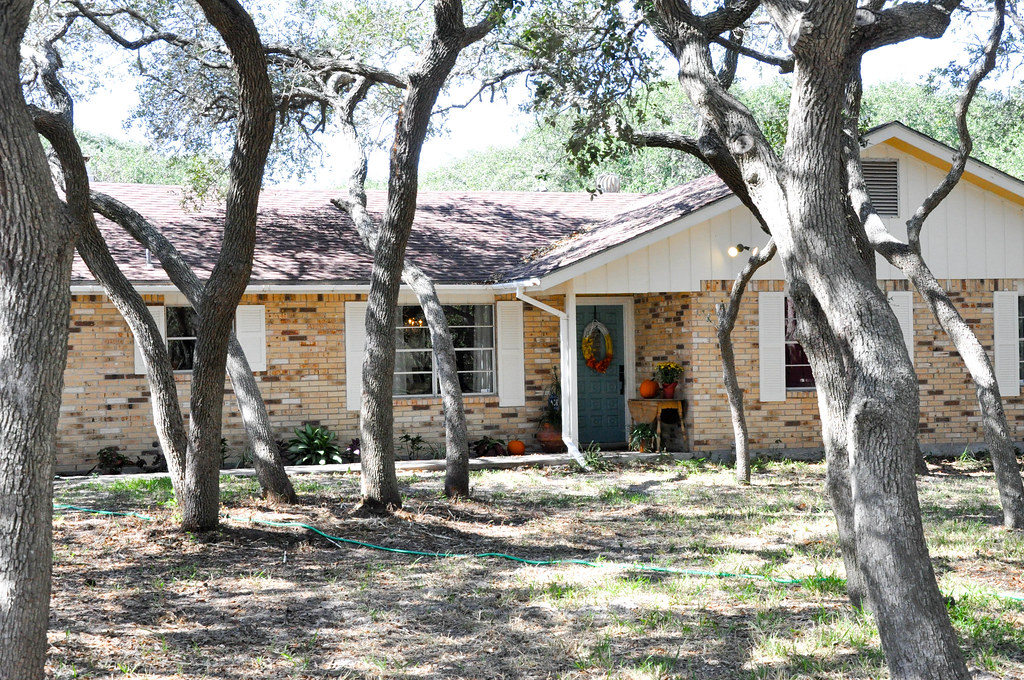
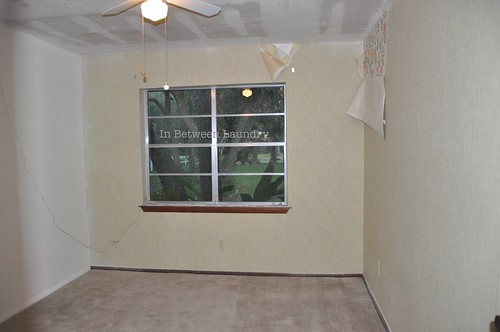
Our newest adventure is the guest bathroom. Here are the before pictures so you, too, can marvel at how its 1984 glory days had been living on for decades.

strange chainy light fixtures (I won't tell you exactly where I held them when a few girlfriends were over, but it involved pretend anatomy and got me a good laugh--just like 7th grade),

 faux mint green marbled countertops, 


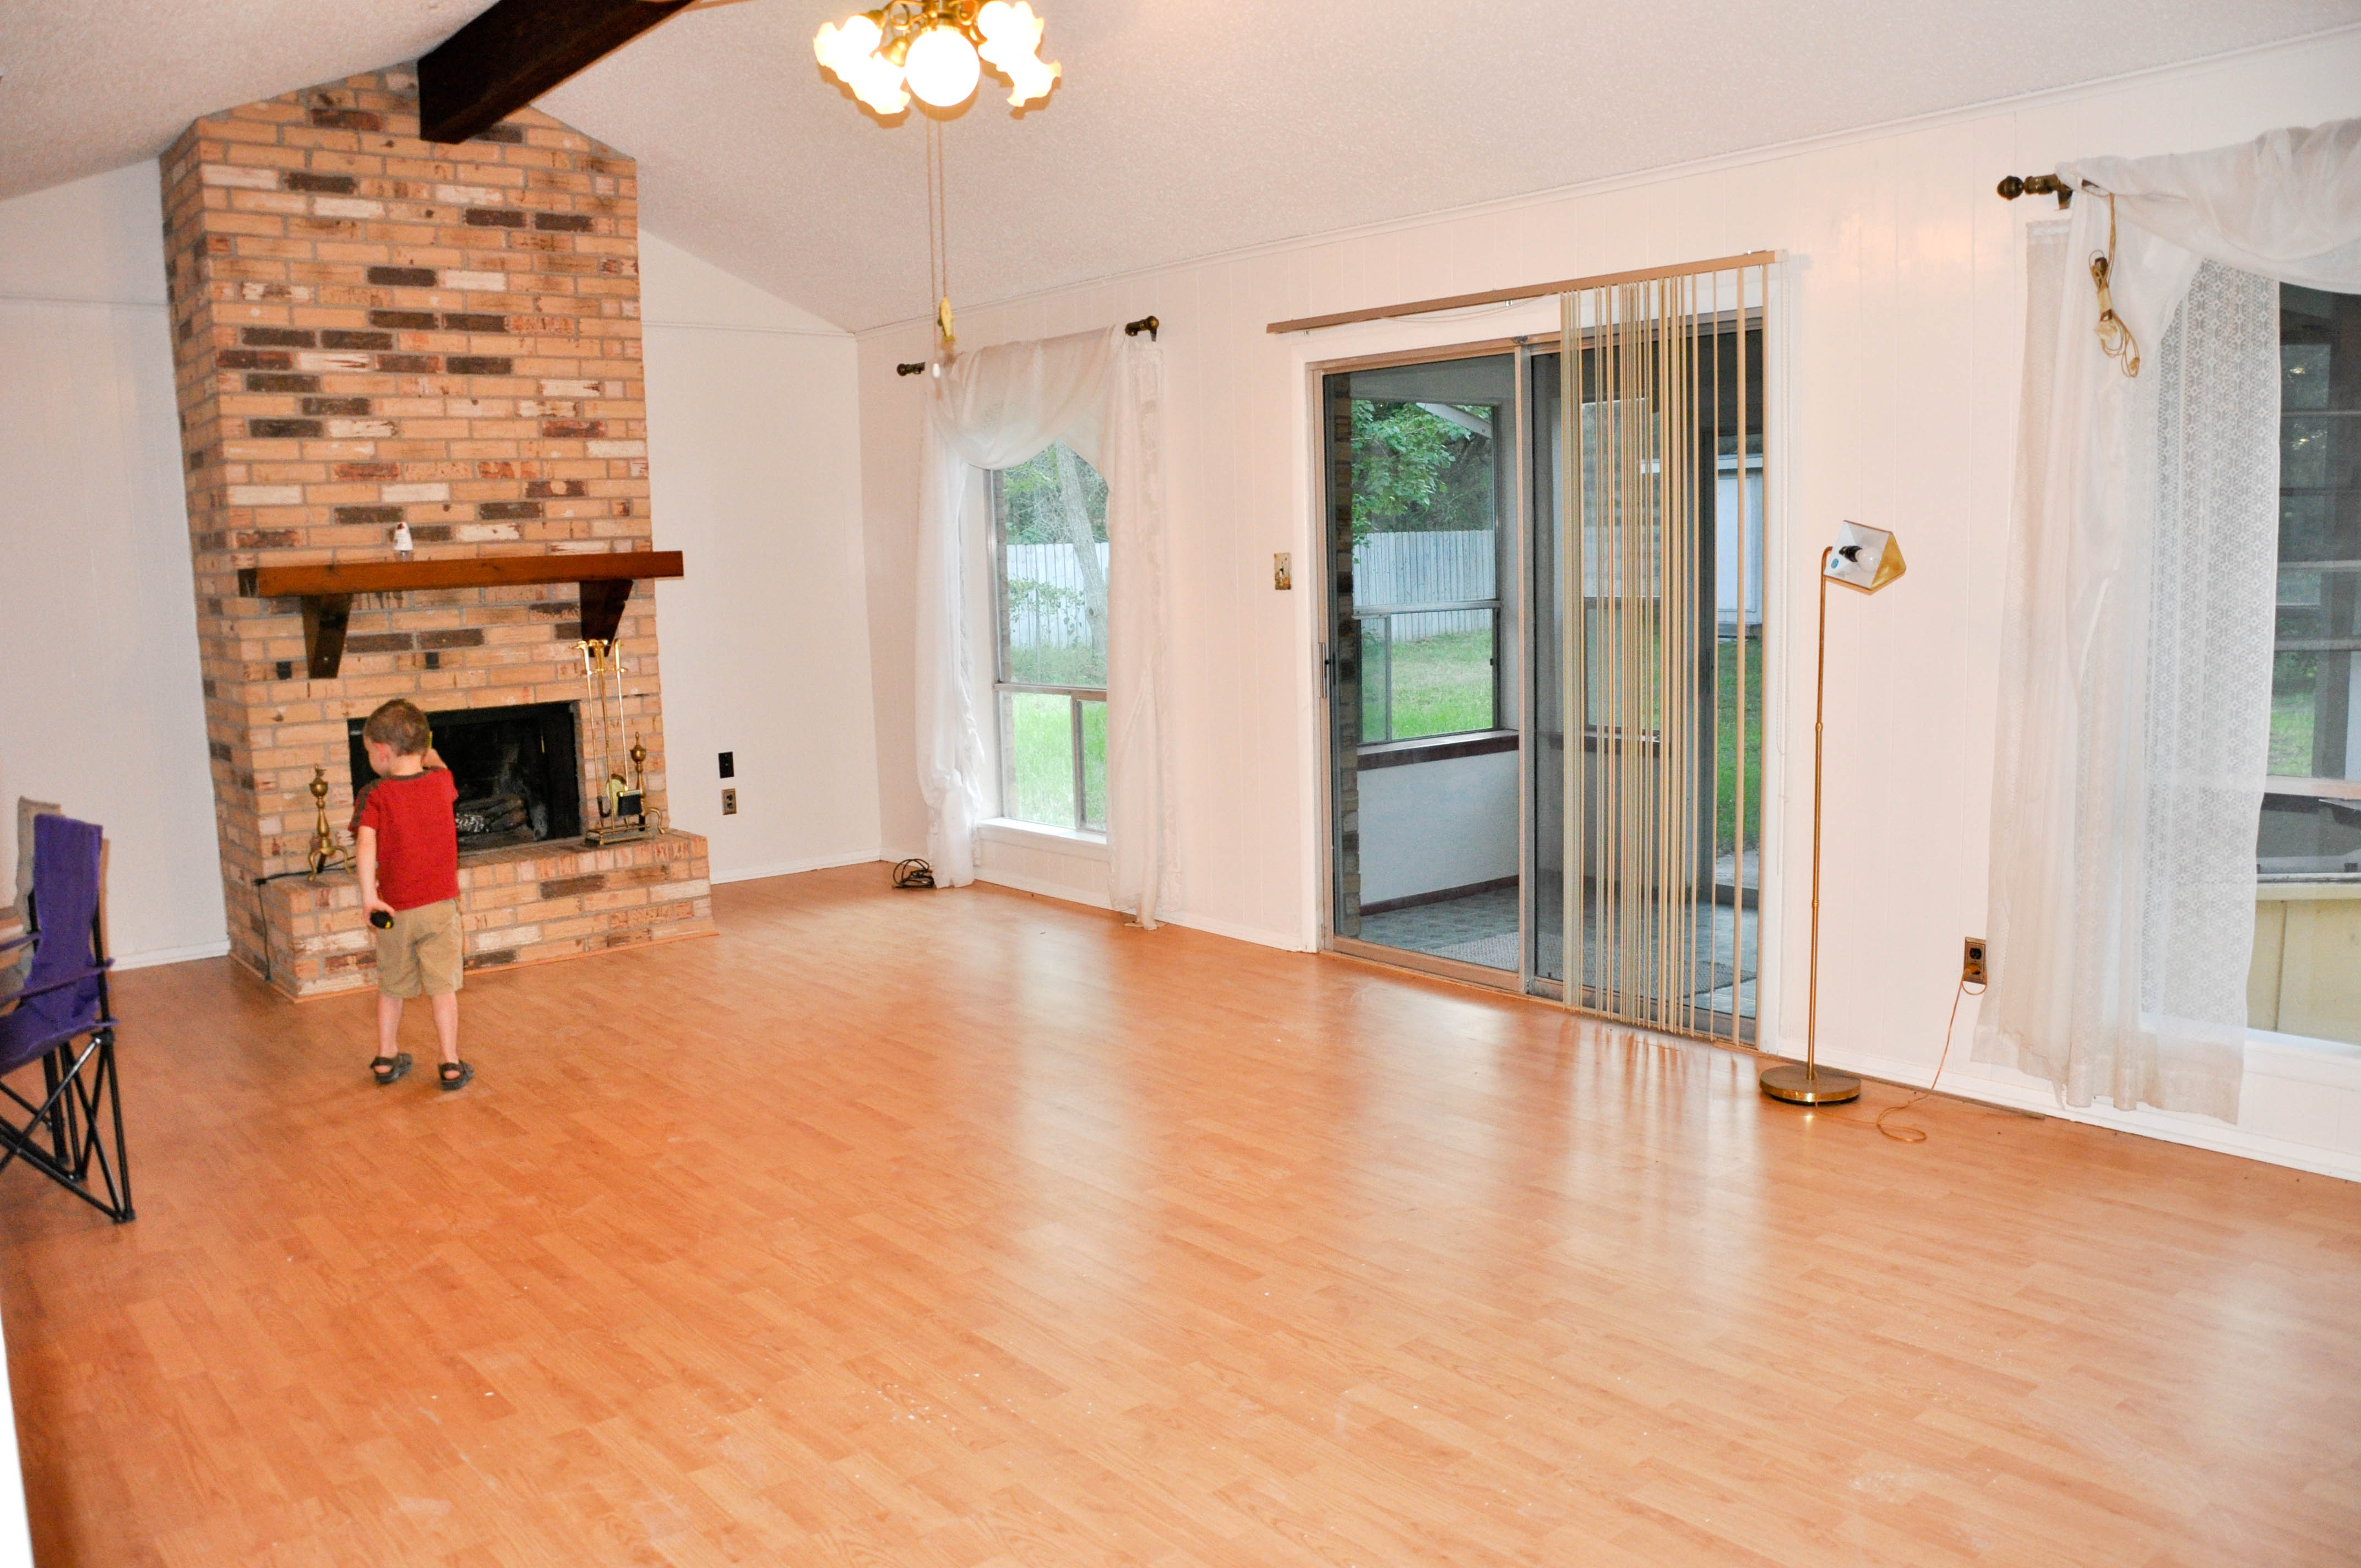
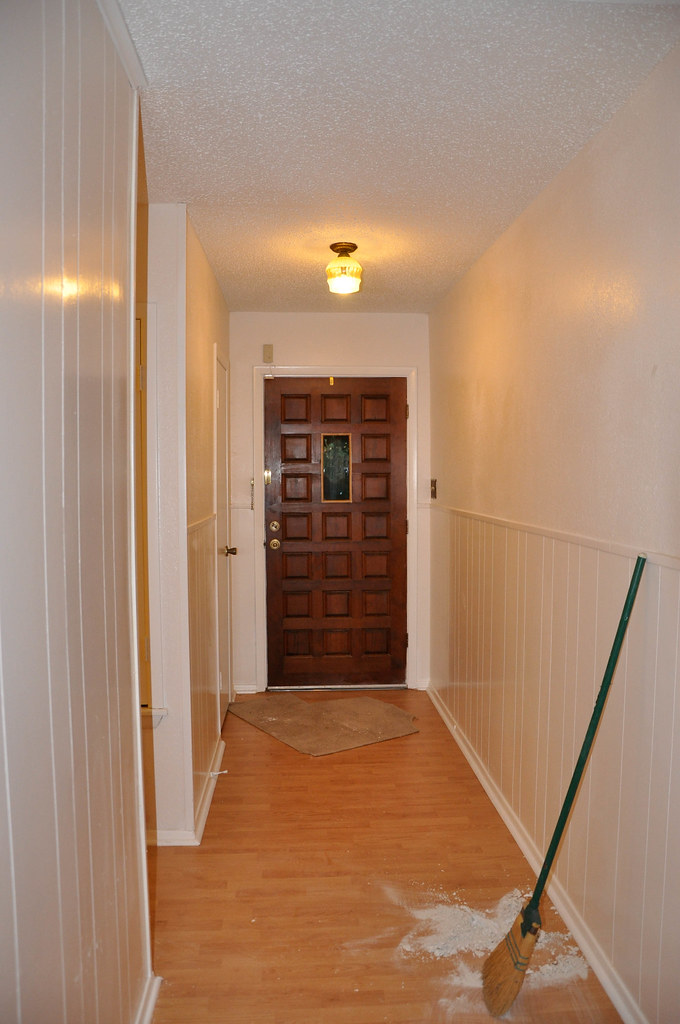
peeling wallpaper (complete with a sad, sad trim) and bad laminate flooring,


awkward (and cheap) cabinet and an awfully small potty with a soft, cushy seat that spoke to whomever sat on it, "pffshhhhhhh," as it flattened underneath the weight. 

Aside from cosmetic issues that I so lovingly addressed above, the space had quite a few functional issues. 

1. The size and shape. It is a square bathroom with enough floor space but not a lot of surface, storage or wall space.

2. No windows = no natural light. The bathroom was very dark with only a vanity fixture for lighting. This also made choosing a paint color tricky.

3. Awkward, small toilet that felt like it was in the middle of the room, very exposed.

4. No vent

5. Small bathtub/shower

6. Narrow mirrors that left the room feeling like even more of a cave

7. Shallow sink with low faucet
DSC_0016.jpg

Our Solutions:

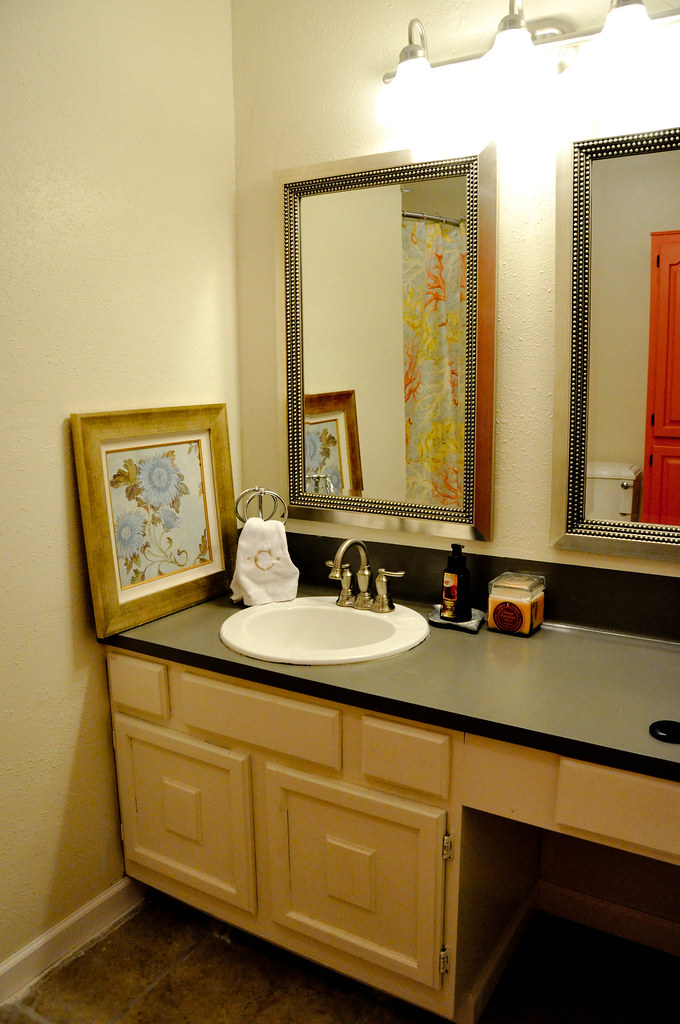
1. Floors. The old vinyl was ripped up and replaced with a grayish 18" ceramic tile and gray grout, then new baseboards were added. I want to point out that this was really old laminate flooring and solid glue held it in place. We pulled up as much as we could, but the bits and parts that wouldn't budge were tiled right over. It saved a lot of time--and elbow grease-- and was recommended by the professionals we spoke with.

2. Lighting. My images aren't stellar, but the fixture is here if you're interested. I'll also note that I got it for a half-price deal for only $26.10 and free shipping. Win! It adds so much more light, but the room really did need a centered overhead light too. Because we also wanted to install a vent, we went with a combo light/vent and it's functional--not the coolest (just a standard flushmount). 

DSC_0011.jpg

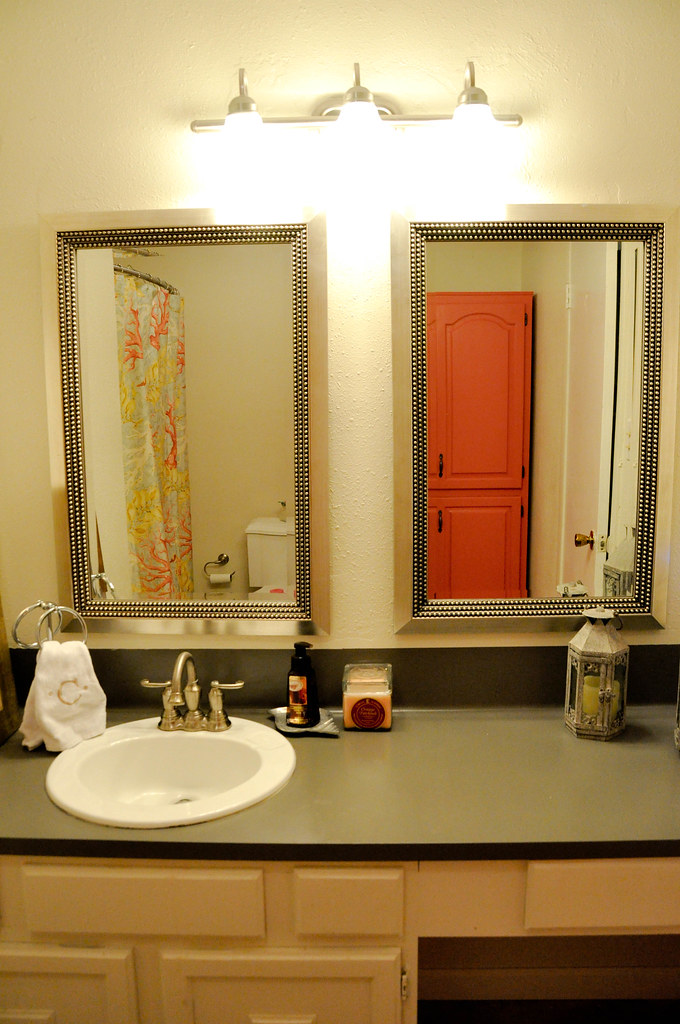
3. Countertop.  Though we did install granite in the kitchen, that was not in the budget for the bathrooms and I really deliberated on this decision. Should we install a different, more attractive, laminate? What about tiling it? Or, should we do nothing and save up for a solid surface? In the end, we saved our cash and painted it with a paint made specifically for laminate countertops, made by Rustoleum. It took two coats-- was VERY strong smelling-- but worked great! The paint was only about $20 and made one of the grandest impacts in the room. I recommend it.

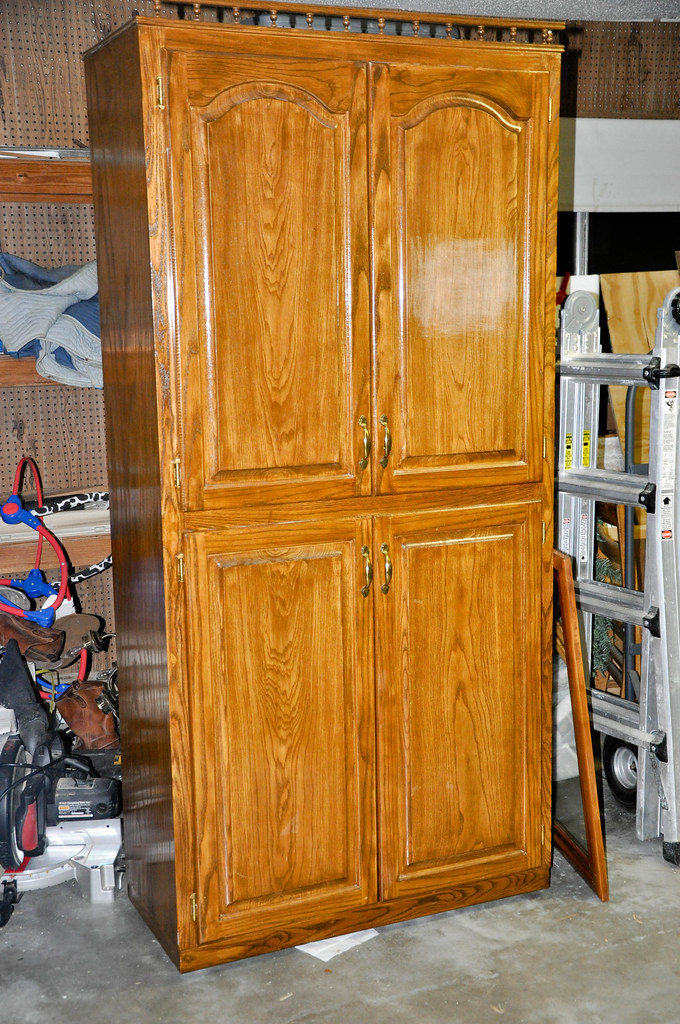
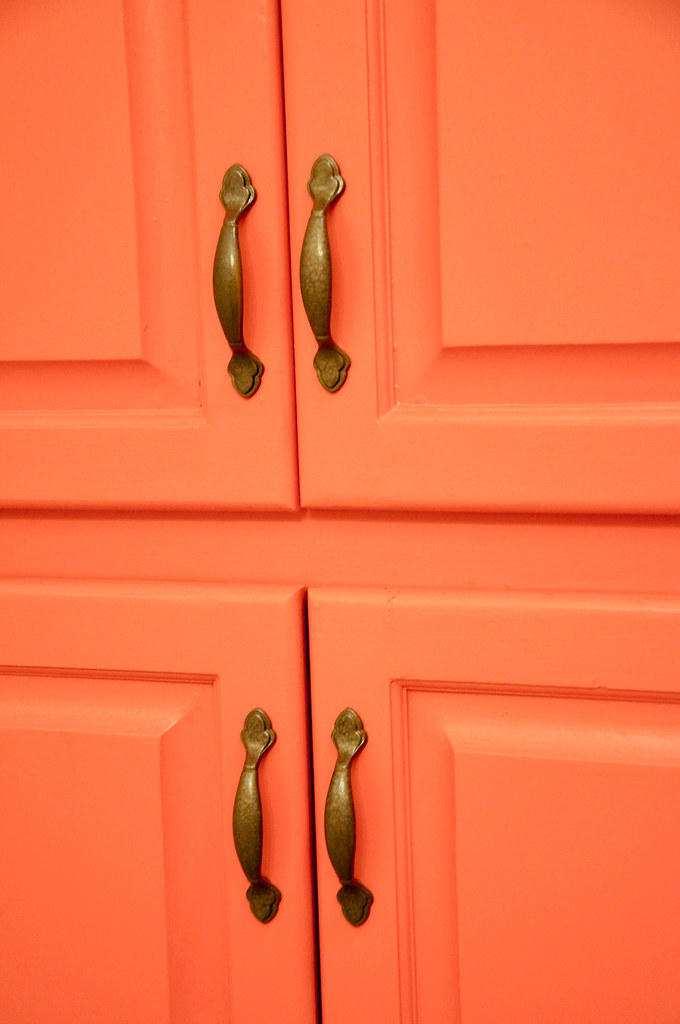
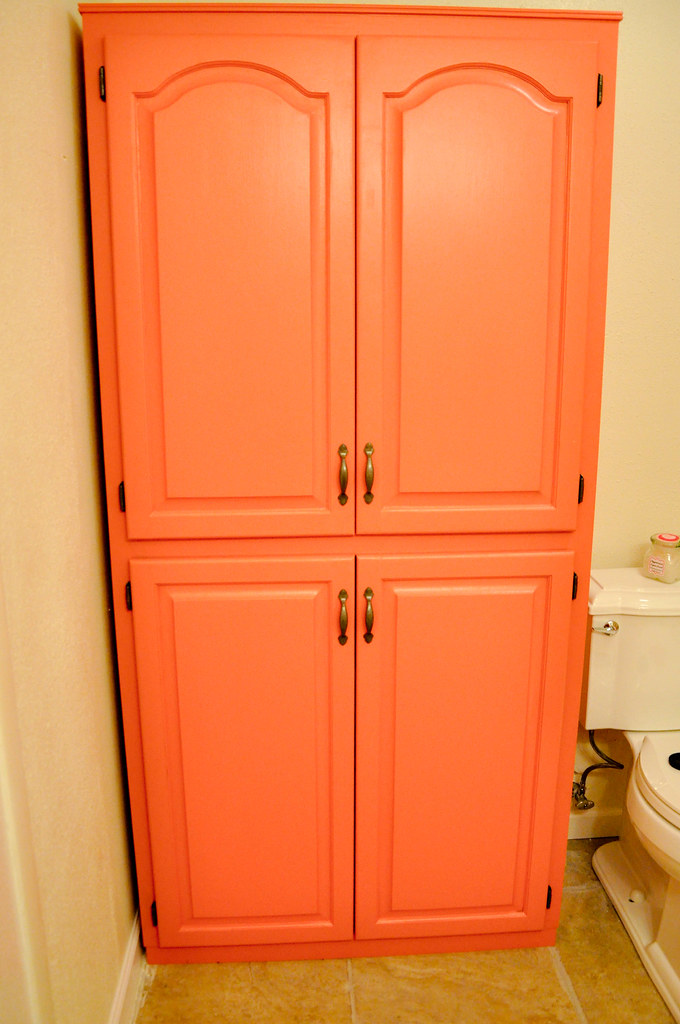
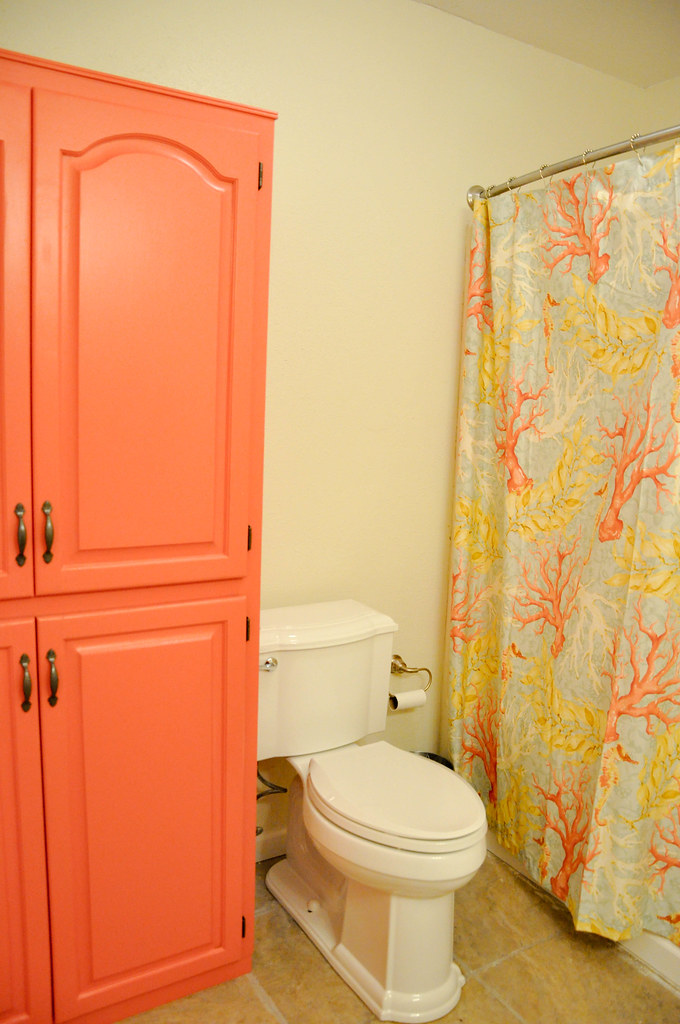
4. Cabinets. The vanity cabinet stayed and got a coat of glossy white. The too-narrow corner cabinet (with warping doors and a mildew smell) was pulled out and replaced by a Craigslist find that I sanded and painted with Valspar Firecracker. More on that later.

DSC_0010.jpg

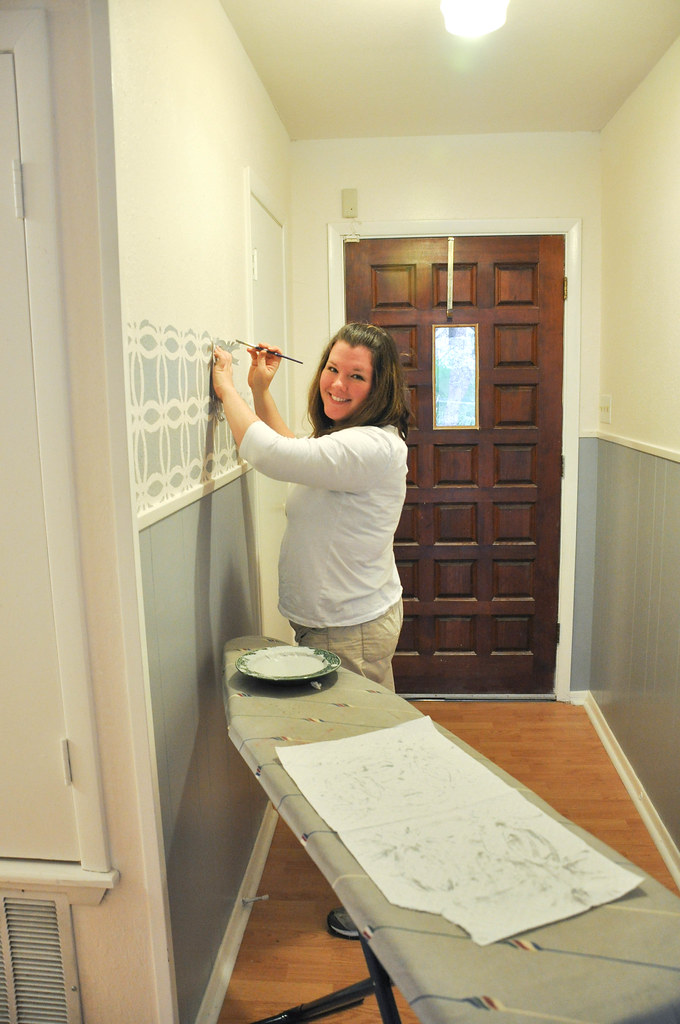
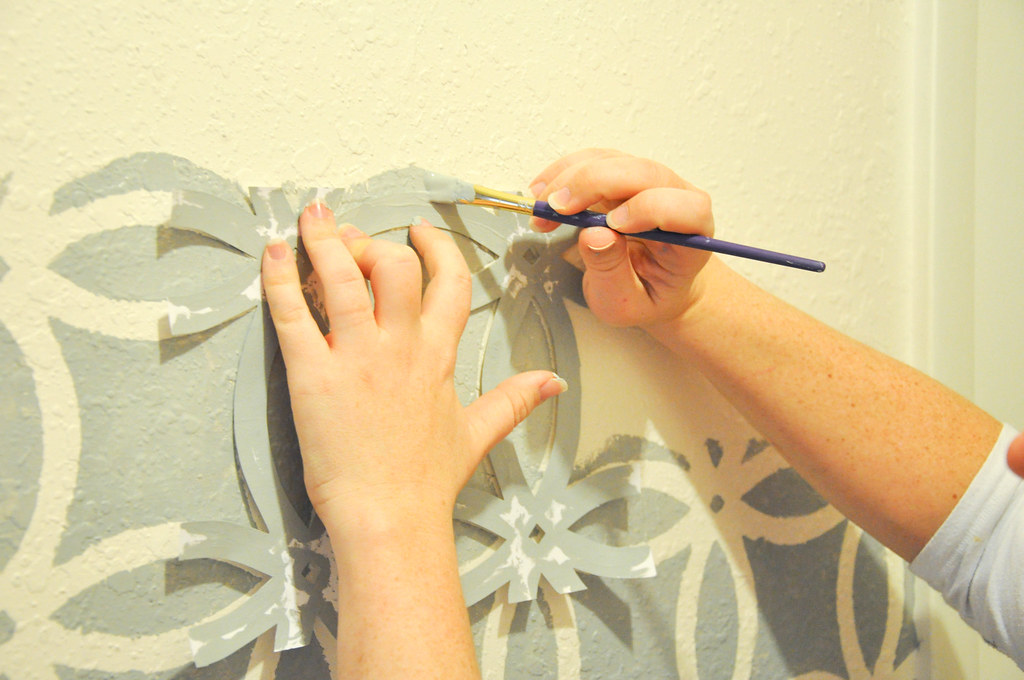
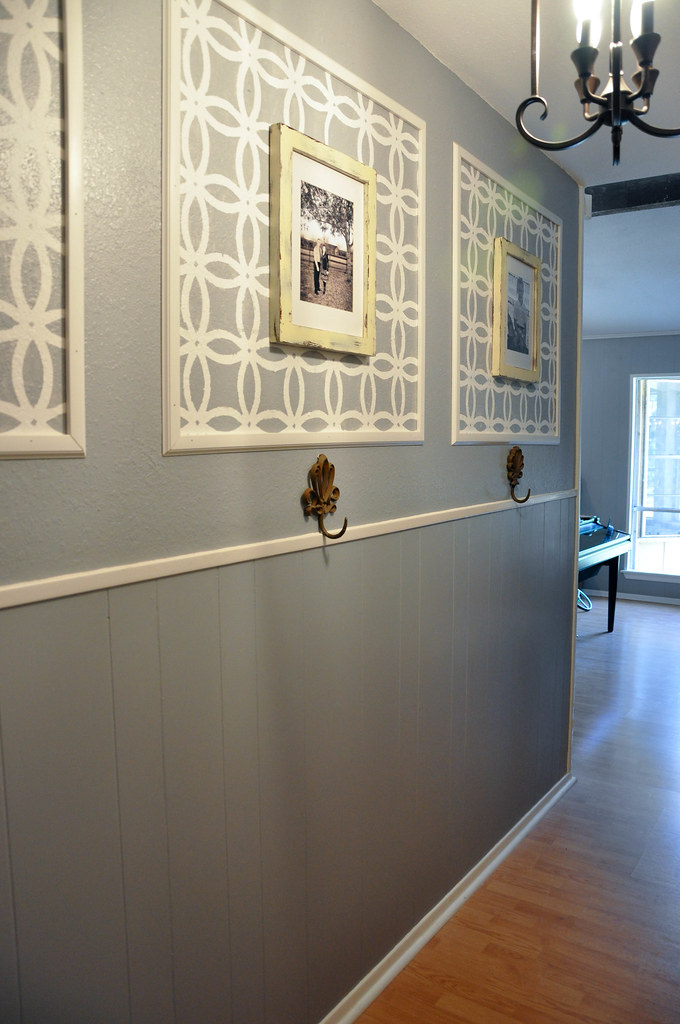
5. Walls. Oh, the wretched wallpaper. I know it's very chic right now, but I will NEVER install wallpaper in a house. Jeremy proved his undying love a million times over by removing most of it and then retexturing the walls where drywall was ripped. And he never even said a bad word. The man is the Ghandi of home renovating. 

The paint color I chose is called Bistro White (also Valspar). I wanted to go very neutral to balance the bright curtain and bold cabinet. Also, the room is windowless and needed to maintain a bright, airy element.

6. Potty. Replaced. Good solid seat. The end.

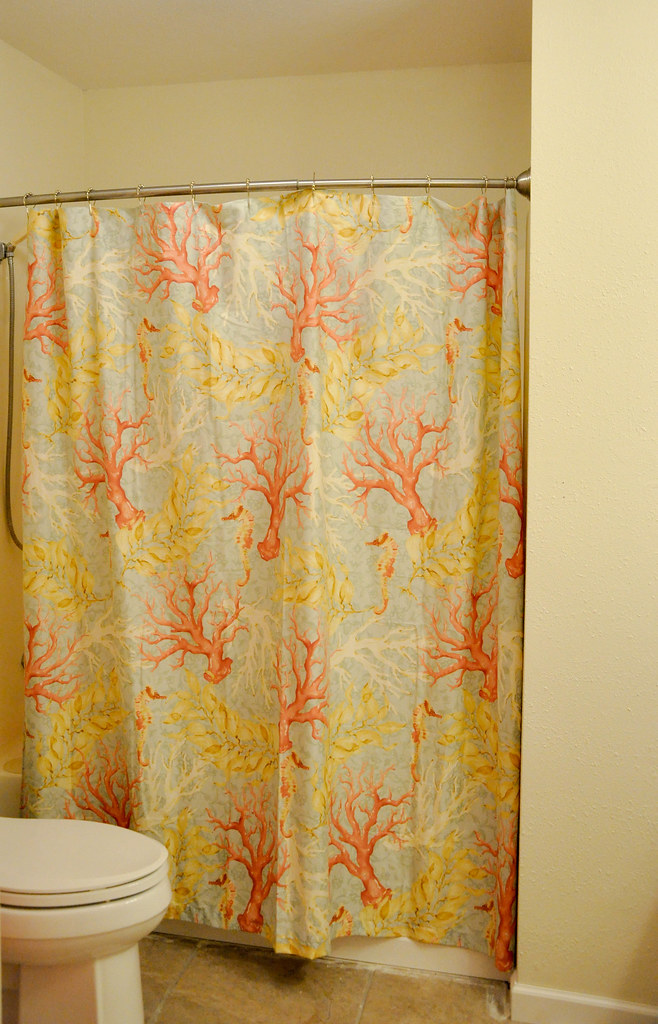
7. Details. We went with two pewter mirrors, a prettier faucet, a new toilet paper holder and a curtain rod that bows out to give a bigger feel to the smallish tub. I also splurged on the Pottery Barn curtain that adds color and punch, but still blends in with the softer blues and overall palette of our home.

DSC_0018.jpg

As is always the case with me, I haven't decided on a few accessories for the walls. 

It's so much better now. Best of all, we really did pay very little for the dramatic difference between before and after.

erin

Shared with: Miss Mustard Seed, Sugar Bee Crafts, A Bowl Full of Lemons, Tatertots and Jello

Wednesday, October 19, 2011

A Year of DIYing

It's been a while since I'd written about our DIY projects and fixing up this old house we bought a year ago. Wow. It really is hard to believe twelve months have vaporized behind us-- a little longer, in fact.

But we've been doing a lot. Time slips by like that when you're excited about living your life. When I went back to dig up pictures of the house, I scrolled through the months of images saved on my computer and was stunned at how far we've come-- as a family first, and also on the work we've done on our home.

the boys at this time last year (right before moving)

    • My boys turned 4 and 1 in this house.
    • We hosted Christmas Eve for the first time here.
    • We added a new dog to our family.
    the boys about a month ago
      • We met some new neighbors who have become friends.
      • We learned how to lay tile, rewire lights, install faucets and molding, how to retexture ceilings and walls, and how to get help when we needed it.
      • We developed a clearer style-- that's still evolving.
      October of last year-- greener grass, but LOTS of overgrown landscaping that hid the house from the street
      • Jeremy and I celebrated our 9th anniversary and started saving up for a trip to Italy for our 10th.
      • We bought a new car.
      • My baby took his first steps and said "Mama" right here in our living room.
      • My four-year-old learned to ride a bike on this driveway and read his first book at the dining room table.
      DSC_0020.jpg
      This year, Texas saw a terrible drought that took most of our grass with it. We did a lot of other yard work, though, removing about twenty giant palm trees that hid our house and harbored roaches.

      DSC_0022.jpg
      The new front bed we put in this summer.

      Jeremy and I enjoy the work we've devoted to making our formerly ugly house into a cozy, inviting home for our family. It's time we spend together and it's an investment into our future memories. The pride of accomplishment, of learning to mend an uncomfortable space into a family place, has been invaluable. I wouldn't trade it.

      People always ask us, "Would you buy the house again, knowing all the work ahead of you?" Our answer is "Yes!" We have become better for it.

      And we saved a fortune!

      Thursday, September 1, 2011

      Living Room Progress

      I was talking to a long-distance friend last night and I was telling her all about our house and the progress we'd been making.

      Friend: "So... were you ever planning on putting pictures of it on your blog so I can see it?"

      Me: "Well... it's not perfect yet."

      And that got me thinking...

      Is it ever going to be "perfect"? As soon as I have it just exactly right, the styles will change or we'll need to fix/replace something.

      So I'm going to share what we've done so far. The progress. And I have to say that I'm pretty proud of  the progress.

      Before:
      DSC_0016.jpg

      After:
      DSC_0050.jpg

      Sure, there are a few changes I want to make, like what to put over the couch (I have a few ideas swirling around in my head) and adding a rug (that won't be too scratchy for baby knees or too expensive for dirty boys, or ugly--I mean, that seriously limits my choices).

      DSC_0052.jpg

      Here's the run-down so far:

      1. We added built-in bookshelves (other than our kitchen countertops, this is the only thing we paid a professional to do).

      2. Painted the walls the same color as the stenciled entryway.

      3. Painted the fireplace white. When I say white, I mean white. It's currently just primed. But I really like how crisp it looks.

      4. Bought thrift-store end tables and painted them with Krylon midnight blue.

      DSC_0058.jpg

      5. Added accessories-- pillows, curtains, and other pretties. My favorites are the silverware that my late grandmother framed herself. I simply changed the trim. She was so creative and adventurous with decorating.

      DSC_0051.jpg

      6. We also broke our cheap selves down and bought our first new TV. The old one was the kind that the kids knew not to touch because if it fell on one of them, they would be dead instantly. The picture was a little fuzzy in spots and the whole thing was about three feet deep. Yes, it was time.

      Well, what do you think? Homier, isn't it?

      erin

      Shared with: Miss Mustard Seed, Tatertots and Jello, Be Different Act Normal, Sugar Bee Crafts

      Sunday, May 1, 2011

      Front Entry Makeover with Stenciling

      {Our Entryway}

      Before:

      DSC_0017.jpg

      When we bought our home in September, we knew we had a LOT of work ahead of us. 

      And we're slowly making some progress, taking it one room at a time.

      (More like: we'll do a little in here, then a little in there, and maybe one day we'll have this house done!)

      Since I recently posted about our front door makeover (you can read about that here), I wanted to show you the other side of that door...

      our very narrow and blah, blah, bland entryway.


      DSC_0006.jpg

      The very first thing we did (and by "we" I mean Jeremy) was scrape the popcorn ceilings (you can read all about that messy mess here and see a bit of the dust pile in that top photo).


      DSC_0007.jpg

      Then I got to work. 

      I created my own stencil with my Silhouette machine and cardstock but you could easily find a pattern you like and cut it with an exacto knife. My stencil was definitely not a complicated design.

      Okay. So there is PLENTY of DIY stenciling advice out there, but here's what worked for me and I'm pretty sure I tried just about everything else:

      My main method:

      1. I used a small paintbrush with lots of paint on it.

      2. I held the stencil in place with one hand while I painted the outline of the stencil with the other hand.

      3. Then I removed the stencil to paper towels and blotted it.

      4. Next I filled in my lines I had outlined.

      Another method I liked:

      I used the same small paintbrush with very little paint on it and stippled the stencil on the wall. In other words, I didn't paint and fill in lines. This technique was a lot faster, but the lines weren't as clean. It worked very well for the small dots that needed to be filled.

      DSC_0084.jpg

      So... I changed my design horse mid-stream and opted for frames with stenciling inside, instead of stenciling the entire wall.

      I'm so glad I did! It was a lot faster and adds more visual interest.

      Jer and I measured the squares that I had envisioned in my mind's eye and I did all the painting and stenciling (he did help with the top and corners).

      Then Jeremy used molding to frame out the edges.

      DSC_0078.jpg

      I created some simple, custom art using spray painted Wal-Mart frames that I scraped with steel wool.

      I also added our family name in brown vinyl to make it a little more personal and finished the space off with a new lighting fixture and rug. 

      DSC_0082.jpg

      Before
      DSC_0017.jpg

      After

      DSC_0077.jpg

      The paint I used was Valspar "Metropolis."

      signature

      Linked to: Take a Look Tuesday, Today's Creative Blog, Tatertots and Jello, The Creative Crate, The CSI Project

      Monday, April 18, 2011

      Front Door Makeover

      If you are a facebook liker (how do you say that?), then you know I have been working on a front door makeover.

      I finally got my porch light in and Jeremy installed it over the weekend. 

      Are you ready to see it?

      Before:

      DSC_0002.jpg


      It wasn't terrible, just a little bland and in need of some color.

      The front door should welcome visitors to our home and I wanted it to stand out.

      After:

      front porch makeover

      We added new hardware and vinyl numbers in addition to the new paint and light fixture.

      vinyl address numbers on door makeover

      Here's a little tip if you want to paint your own door...

      After the paint has dried, it takes several days for it to set completely. Well, you can't really leave your door open that long.

      We used Vaseline on the edges to keep the door frame from sticking and pulling off my new paint. It worked great!

      The paint I used was Valspar and the color is called Belle Grove Spruce. It's a latex-based exterior paint and I did not prime first.
      signature

      Linked to: Today's Creative Blog, A Bowl Full of Lemons, Domestically Speaking, The Creative Crate, Tatertots and Jello, Centsational Girl


      Domestically Speaking


      Tuesday, March 1, 2011

      The Baby's Room: A Makeover Story, Part 3 {Big Reveal}

      After my little experiment in Picnik, I painted the circles right on the walls. 

      DSC_0135

      Basically, I cut out circles in four different sizes from card stock and made myself a stencil.


      To get the shade just right, I mixed the original paint color with white at a 1:1 ratio.

      DSC_0137

      I applied vinyl lettering above the baby bed.

      DSC_0136

      These little cutey-sheep babies were made from felt. I cut two sides for each sheep and "sandwiched" them around a string of yarn.

      DSC_0004


      The room needs a few more accessories and wall art, so I'll be tackling that as I feel inspired 'cause that's pretty much how I roll.

      To see the befores, go to Part 1 and Part 2.

      Oh, okay. I can't resist:

      Before:
      DSC_0027

      After:
      DSC_0135

      I know, right? Holla!

      signature

      Linked to: Domestically-Speaking, Blue Cricket Designs, Fingerprints on the Fridge, Finding Fabulous,
      Tatertots and Jello, Under the Table and Dreaming, Craft-O-Maniac, The CSI Project