
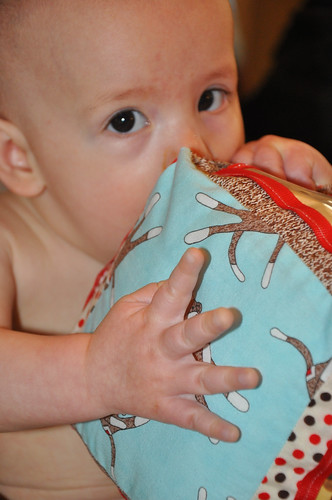
Cupid came early and brought my Squishy-Squish-Squish this fun photo cube for Valentine's Day.

I used photos of our immediate family-- Baby, Brother, Mommy and Daddy.
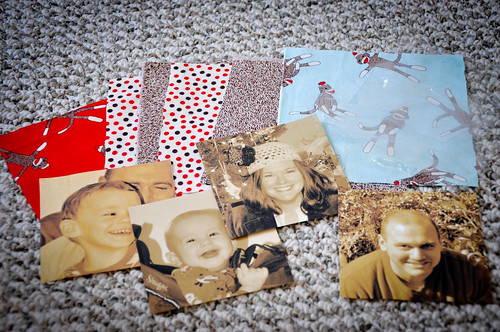
Materials:
6 squares of fabric (6" x 6" each)
4 printed photos (4" x 4" each)
4 pieces of clear vinyl (4-1/4" x 4-1/4" each)*
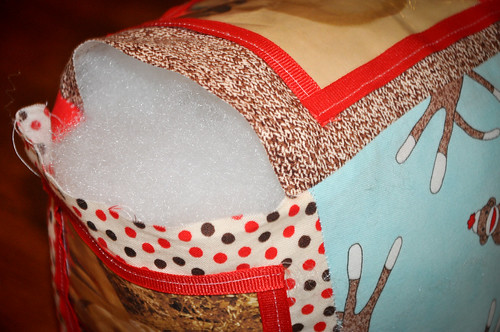
ribbon for outlining the pictures
poly-fill
thread for sewing machine
needle and thread for hand stitching
*TIP: I recycled the clear vinyl packaging from a set of baby sheets and it worked great!
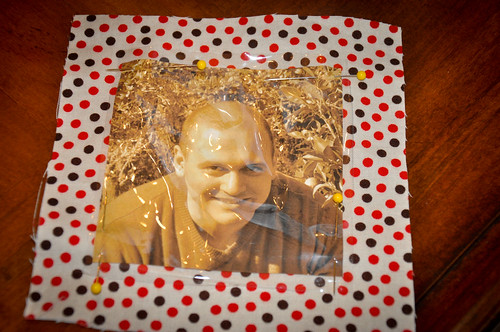
Center the photos on four of the pieces of fabric that you want to use for the sides. Place the clear squares on top of the photos and pin in place.

Stitch in place, closely to the edges. You may want to use a heavy-duty machine needle.
Stitch ribbon on the edges, outlining each picture. This looks cute, but it also keeps those sharp edges on the vinyl from poking baby.
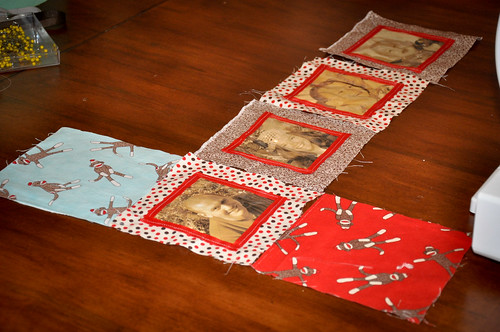
Lay your squares out in a T-shape with your photos side by side and the top and bottom pieces above and below the left picture.

Stitch everything in place, right sides together with a 1/4" seam allowance.
Press the seams open, being very careful not to melt the vinyl.
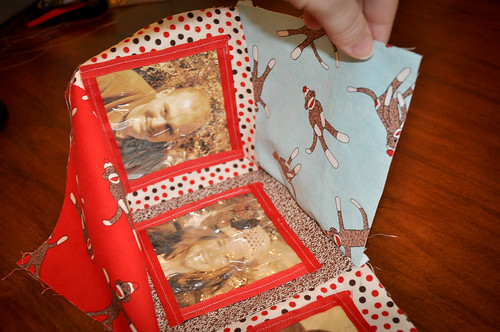
Bring the to and bottom pieces (the sock monkey fabric in my photos) to the next photo square and stitch, right sides together. The photo cube will be inside out at first.

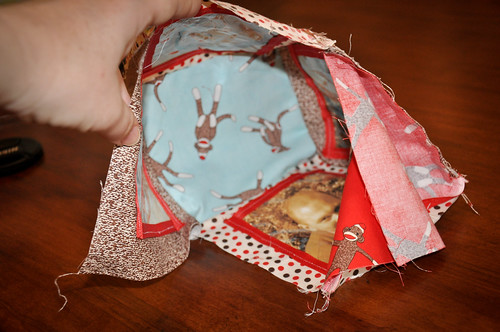
Repeat until all sides--except one--are stitched together in a cube shape.
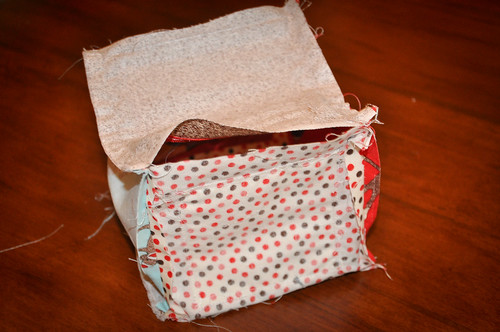
Turn right-side out and stuff with the poly-fill. Hand-stitch shut.

I think I'll make a few more for learning names of cousins, aunts and uncles who live out of town.
For now, my little guy thinks it tastes pretty good.


Adorable! I love the fabrics!!
ReplyDeleteThis baby block is precious--
ReplyDeleteFilled with people he knows.
It makes me so sad
I'm girl who never sews! : )
Great job, Erin! It is definitely a hit!
Wow that is great well done and thanks for sharing. i have been making baby items recently over on my blog http://scratchycatcrafter.blogspot.com tina x x
ReplyDeleteI love this! I'm putting this on my list to make for my niece or nephew who's coming soon :) I saw you on Tatertots and Jello, you have a new follower!
ReplyDeleteOops! Saw you on Craftaholics Anonymous, I haven't had any coffee yet this morning :/
ReplyDeleteThanks for linking to Take-A-Look Tuesday over at Sugar Bee Craft Edition - I featured you today! - Mandy, www.craftedition.blogspot.com
ReplyDeleteThis is such a cute idea! I am going to try to make it for my little man!
ReplyDeleteWould love to have you link it up to our party!
http://www.between3sisters.com/2011/02/midweek-motivation-link-party.html
Super adorable, what a great idea! Thanks for the tutorial!
ReplyDeleteThis is great! I featured it today on Today's Top 20! I'd love for you to stop by!
ReplyDeleteAmanda
www.todaystoptwenty.blogspot.com
This is so cute and creative... I really love it!
ReplyDeleteI featured you today @ http://www.bubblynaturecreations.com/2011/02/what-i-wednesday-baby-gift-ideas.html
come get a featured button! :)
Also very cute!
ReplyDeleteThat is really adorable!! What a great idea!
ReplyDeleteSarah